
I did it again, I heart faces' Fix-it-Friday. I knew i would be working on the activity this morning because all of our principle architects are out today. HOORAY!! I send everyone to their voice mail and no busy work from them :)
Well lets start the show..... i know everyone one is seated at the edge of their seats waiting for my wonderful images.... Na I'm just kidding. (I hope you all heard the sarcasm in that sentence) :) I also have a treat for everyone... meaning the three people that read this site... I have not one image to show, you but two. that is right TWO.... woo hoo...
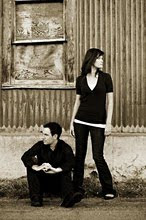
Here is the originial

Here is numero uno..

Work flow
I did almost the same thing i did with my photo fix No 3.
I duplicated the background layer twice
changed one layers blending mode to screen and the other to soft light
Here is what i added
I used a curves adjustment layer. ( for those of you that don't know... an adjustment layer is the circle at the bottom of your layers palette that is half black and half white.)
and pulled the line, right in the middle up a little to give the straight diagonal line a small curve upwards.
I then created another curves adjustement layer to make the coloring.
I played with the different color channels. Red, Green and Blue
I just took screen shots of what i did instead of telling you. You can go into each channel and duplicate the line.
Red Channel
Red Channel

Green Channel

and Blue channel

Now play with the channels and make it your own.
If you like what you see keep your opacity at 100. I changed my opacity to about 75.
I then, brightened up the eyes with my eye pop effect that i did in my fix it No. 3. This time i duplicated the eye layer twice, so i had two eye layers. I just thought it need more eye pop then what the one layer was giving me.
I then saved the image as a png and psd.
I opened my png
Duplicated the background layer and sharpened the layer by going to filter > sharpen > sharpen.
I thought it was a little harsh so i changed the opacity a little, you decide, then i saved it as a png again.
That's it.
Numero Dos

Work flow
Starting with my psd i just saved.
I trashed my two curves layers then created a hue/saturation adjustment layer and changed the saturation to 0 to make it black and white. This adjustment layer should be your top layer so everything is black and white.
Then i duplicated the top most colored layer and changed it to soft light, (cheat way, ctrl j duplicates the layer).
I then went to filter > other > high pass.. and made the radius pixels about 30ish... you decide. This makes a good what they call... milk and cookies effect.
I then flattened everything and made another duplicated layer changed it's blending mode to screen and changed the opacity to about 25ish. Only do this if you think it's to dark.
And this is what i got. :)
Oh, and I cropped the image if you can't tell. :)
I hope my workflow helps you and they make sense
Peace :)


Love the eyes in your first edit!
ReplyDeleteLooks good lady!
ReplyDelete